
How to set up branded keywords
Branded keywords help you filter out searches that include your brand name in SEO Gets, providing a clearer picture of branded keyword performance.
Before you start, make sure your site is connected in SEO Gets. If you’re new to the platform, start with Getting Started with SEO Gets.
Set up your branded keyword filter

Open your site from the master dashboard.
Go to Settings
In the Branded Keywords module, add branded keywords. Accounts with AI credits can also use One-Click Branded Keywords to generate branded keywords instantly.
Enter the brand terms you want to match. Include common variations, product names, and misspellings if people search for them (i.e., seo gets, seogets, etc.).
Check your results
After the filter is applied, you can use the dashboard to review clicks, impressions, and trends for branded searches only using the Branded Queries filter. If the results look too broad, tighten the filter. If they miss obvious brand searches, add more variations.
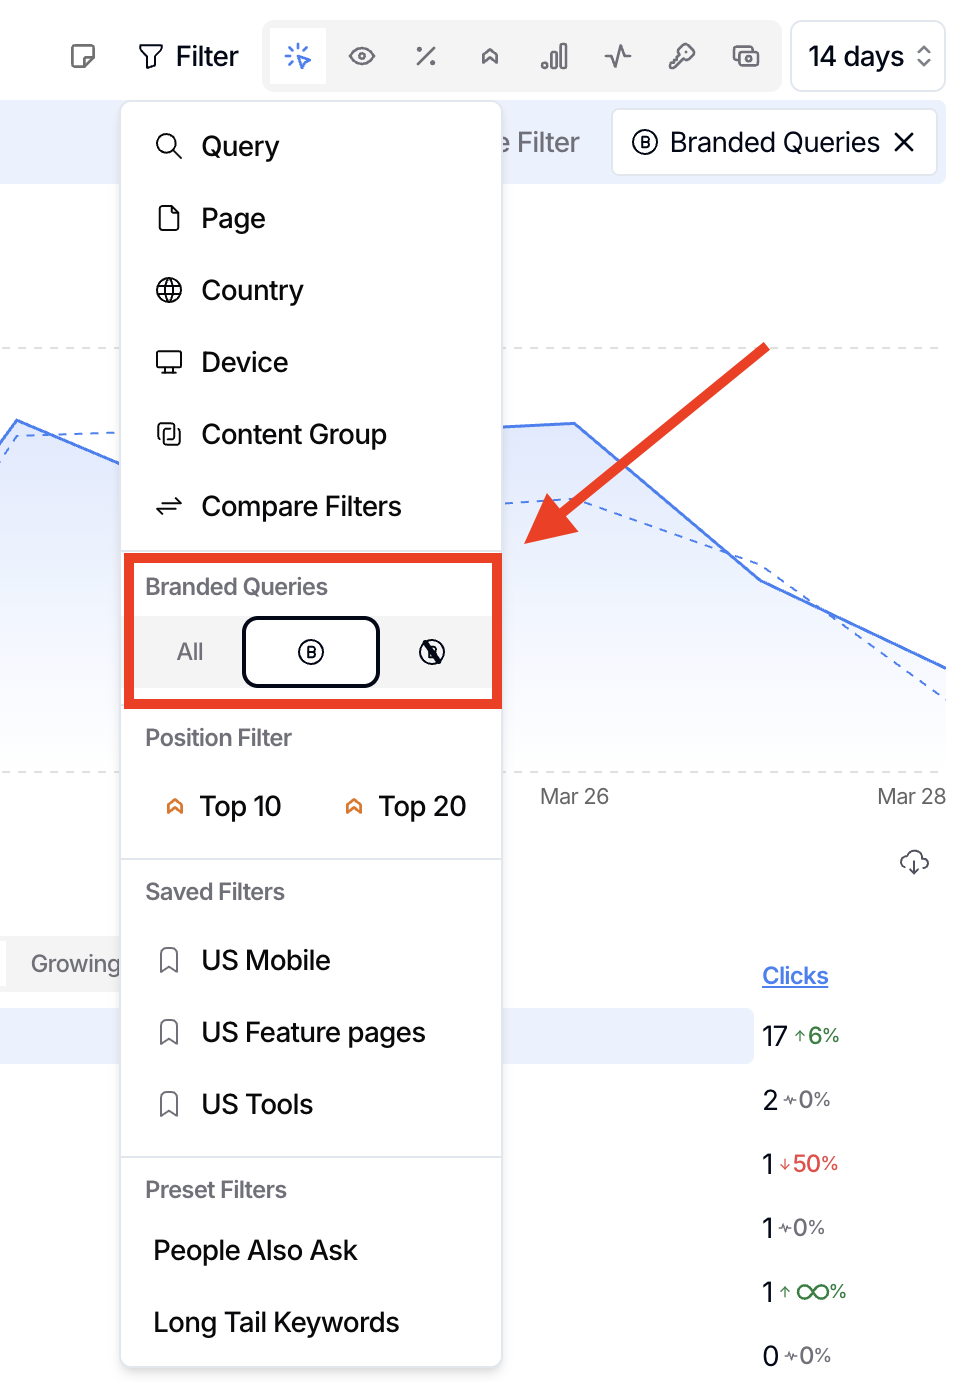
Once you've activated the brand-only filter, check the Queries report for a list of branded queries being captured.

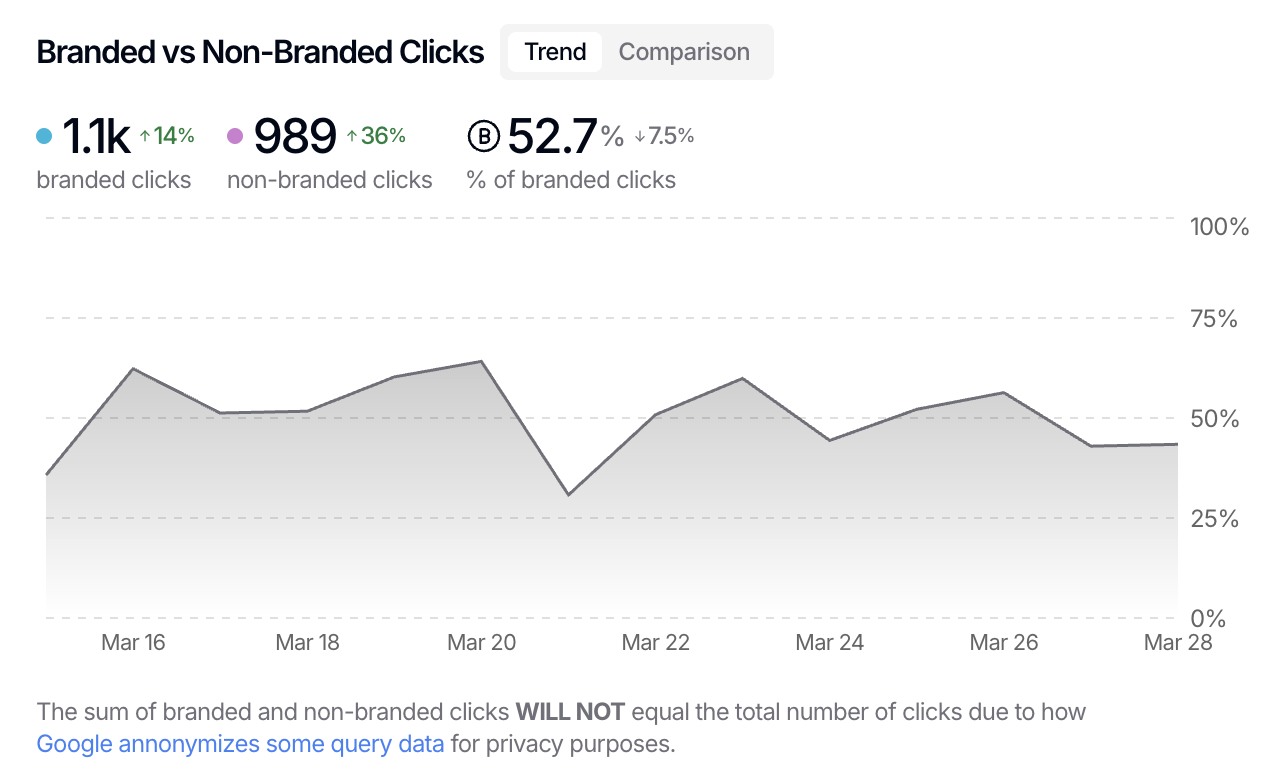
And it doesn't stop there! Once you've confirmed that your branded keyword filters are working, clear your filters and navigate to the Branded vs Non-Branded Clicks report on your dashboard to compare how each group is performing and see a percentage of branded clicks to guide your SEO efforts and balance your funnel.
What’s next
Once your branded filter looks right, you can use the same approach for non-branded research, long-tail queries, AI-search analysis, and more. To learn how to regex filter like a pro, read: 50+ Ready-to-Use GSC Regex Filters for SaaS, Local, and eCommerce SEO.