
Build and save custom filters
Custom filters let you create reusable views for specific workflows—save them once and you won't have to rebuild them each time. Whether you're tracking client-specific queries, setting up recurring report views, or isolating competitor terms, saved filters make it easy to jump straight to the data you care about.
Saved Filters vs Preset Filters
SEO Gets offers two types of filters you can quickly access from the filter popover:
Saved Filters — Custom filter sets you create, name, and reuse. You can scope these to all properties (visible across every site in your account) or to a specific property only.
Preset Filters — Built-in toggles like People Also Ask and Long Tail Keywords. These are ready to use with a single click—no setup required.
Preset filters are great for quick wins, but saved filters give you the flexibility to match your exact workflow.
Build a custom filter
You can combine numerous filters, including by query, page, country, device, and content group. You can also filter by priority pages, branded/non-branded, Top 10/20, or even mix in preset filters. Each filter type has its own set of operators so you can fine-tune what appears in your dashboard.
1. Open the filter builder
From any property dashboard, click the Filter button at the top of the page.
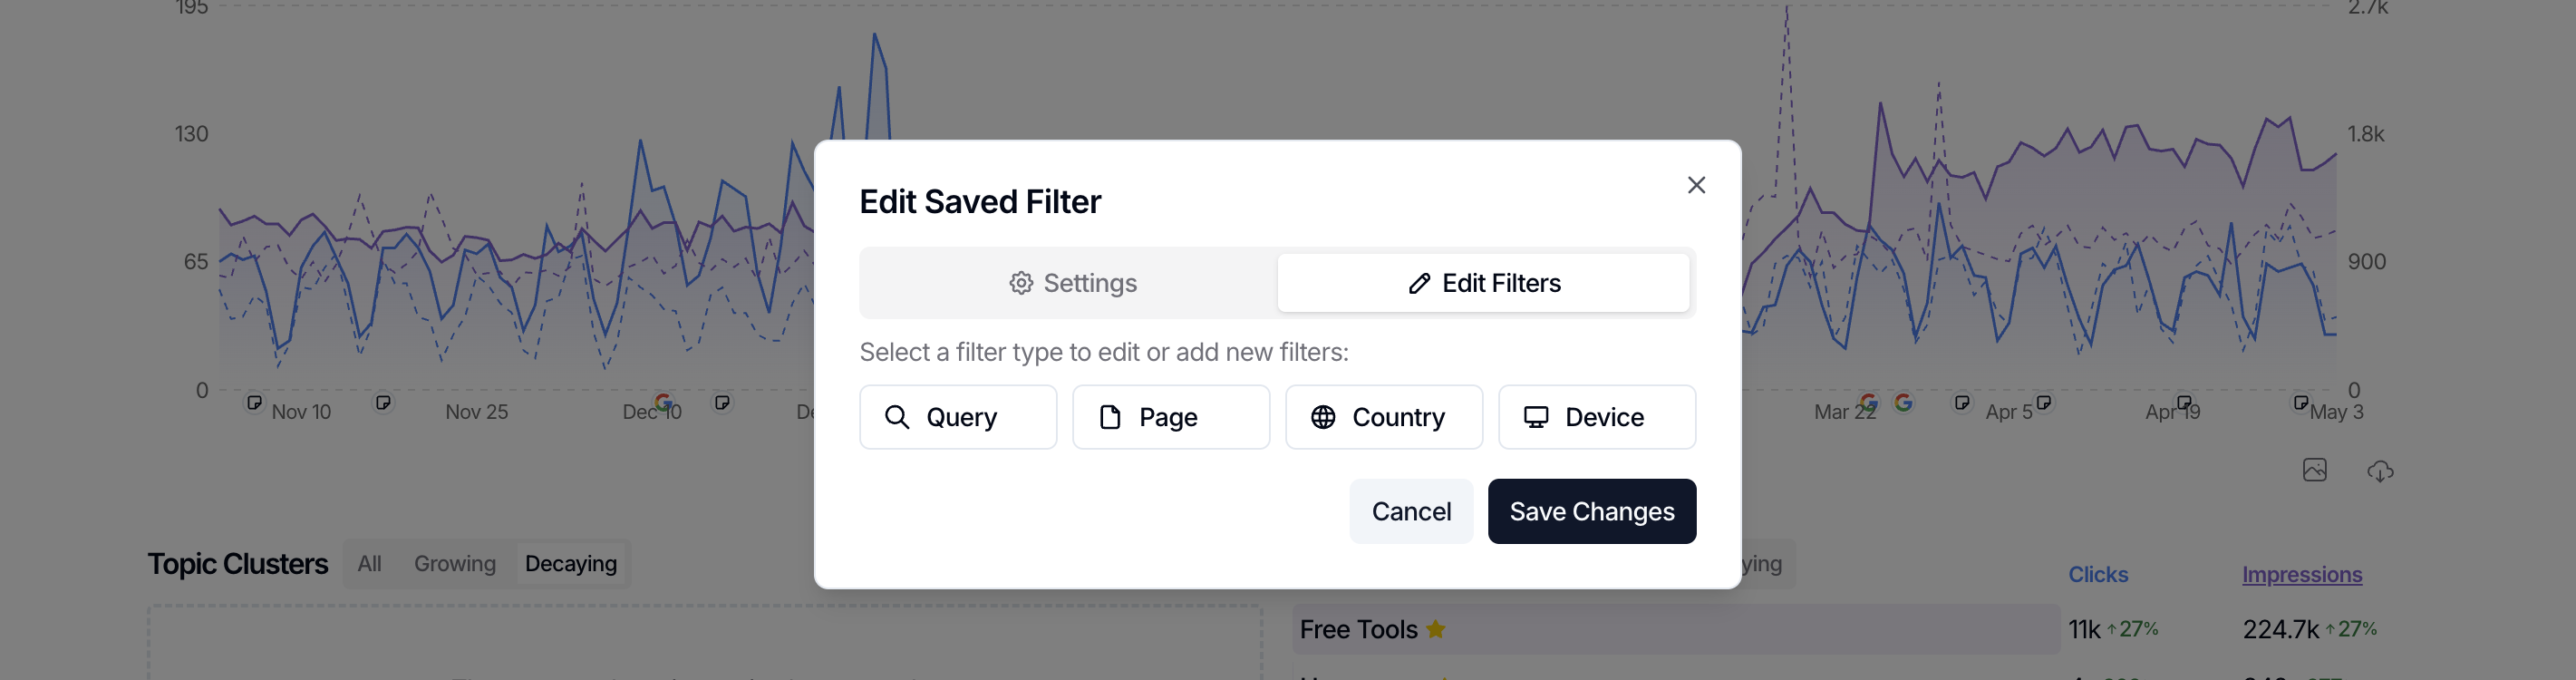
In the popover that opens, click the dimension you want to filter by:
Query — Filter by keywords or search terms
Page — Filter by URL or section of your site
Country — Filter by geographic region
Device — Filter by desktop, mobile, or tablet
Content Group — Filter by groups you've created (like /blog/ or /products/)
2. Choose your operator
For Query and Page filters, select an operator to define how the filter matches your data:
Inclusion —
contains,equals,matches regex,matches any (batch)Exclusion —
doesn't contain,doesn't equal,doesn't match regex,doesn't match any (batch)
For Country and Device filters, simply choose Include or Exclude, then select the values you want to filter by.
The matches any (batch) operator is perfect when you have a list of exact terms—paste them in and SEO Gets will match any of them.
3. Enter your filter values
Type the keyword, URL pattern, country, or device you want to filter by. You can add multiple filter rows using the and... button to combine conditions.
For example, to see all queries that include "seo" but exclude "tools", you'd add:
querycontainsseoquerydoesn't containtools
4. Apply the filter
Click Apply to see your filtered results in the dashboard. The URL updates to reflect your filter, so you can bookmark or share the exact view.
5. Combine filters
After you've dialed in one filter, you can continue to add more filters that map to your workflow. Want to know what questions are leading users to your "free tools" pages? Try combining your "free tools" content group with People Also Ask. Alternatively, you can combine the Priority Pages filter with Long Tail Keywords to see which of your targeted pages are generating the most LLM queries.
Combining filters and saving them gives you nearly unlimited flexibility to fine tune your SEO Gets experience. Saved filters also flow into several other features in SEO Gets. Don't forget to give them a clear name!
Save a custom filter
After applying a filter you'll use again, save it so you can access it with one click.
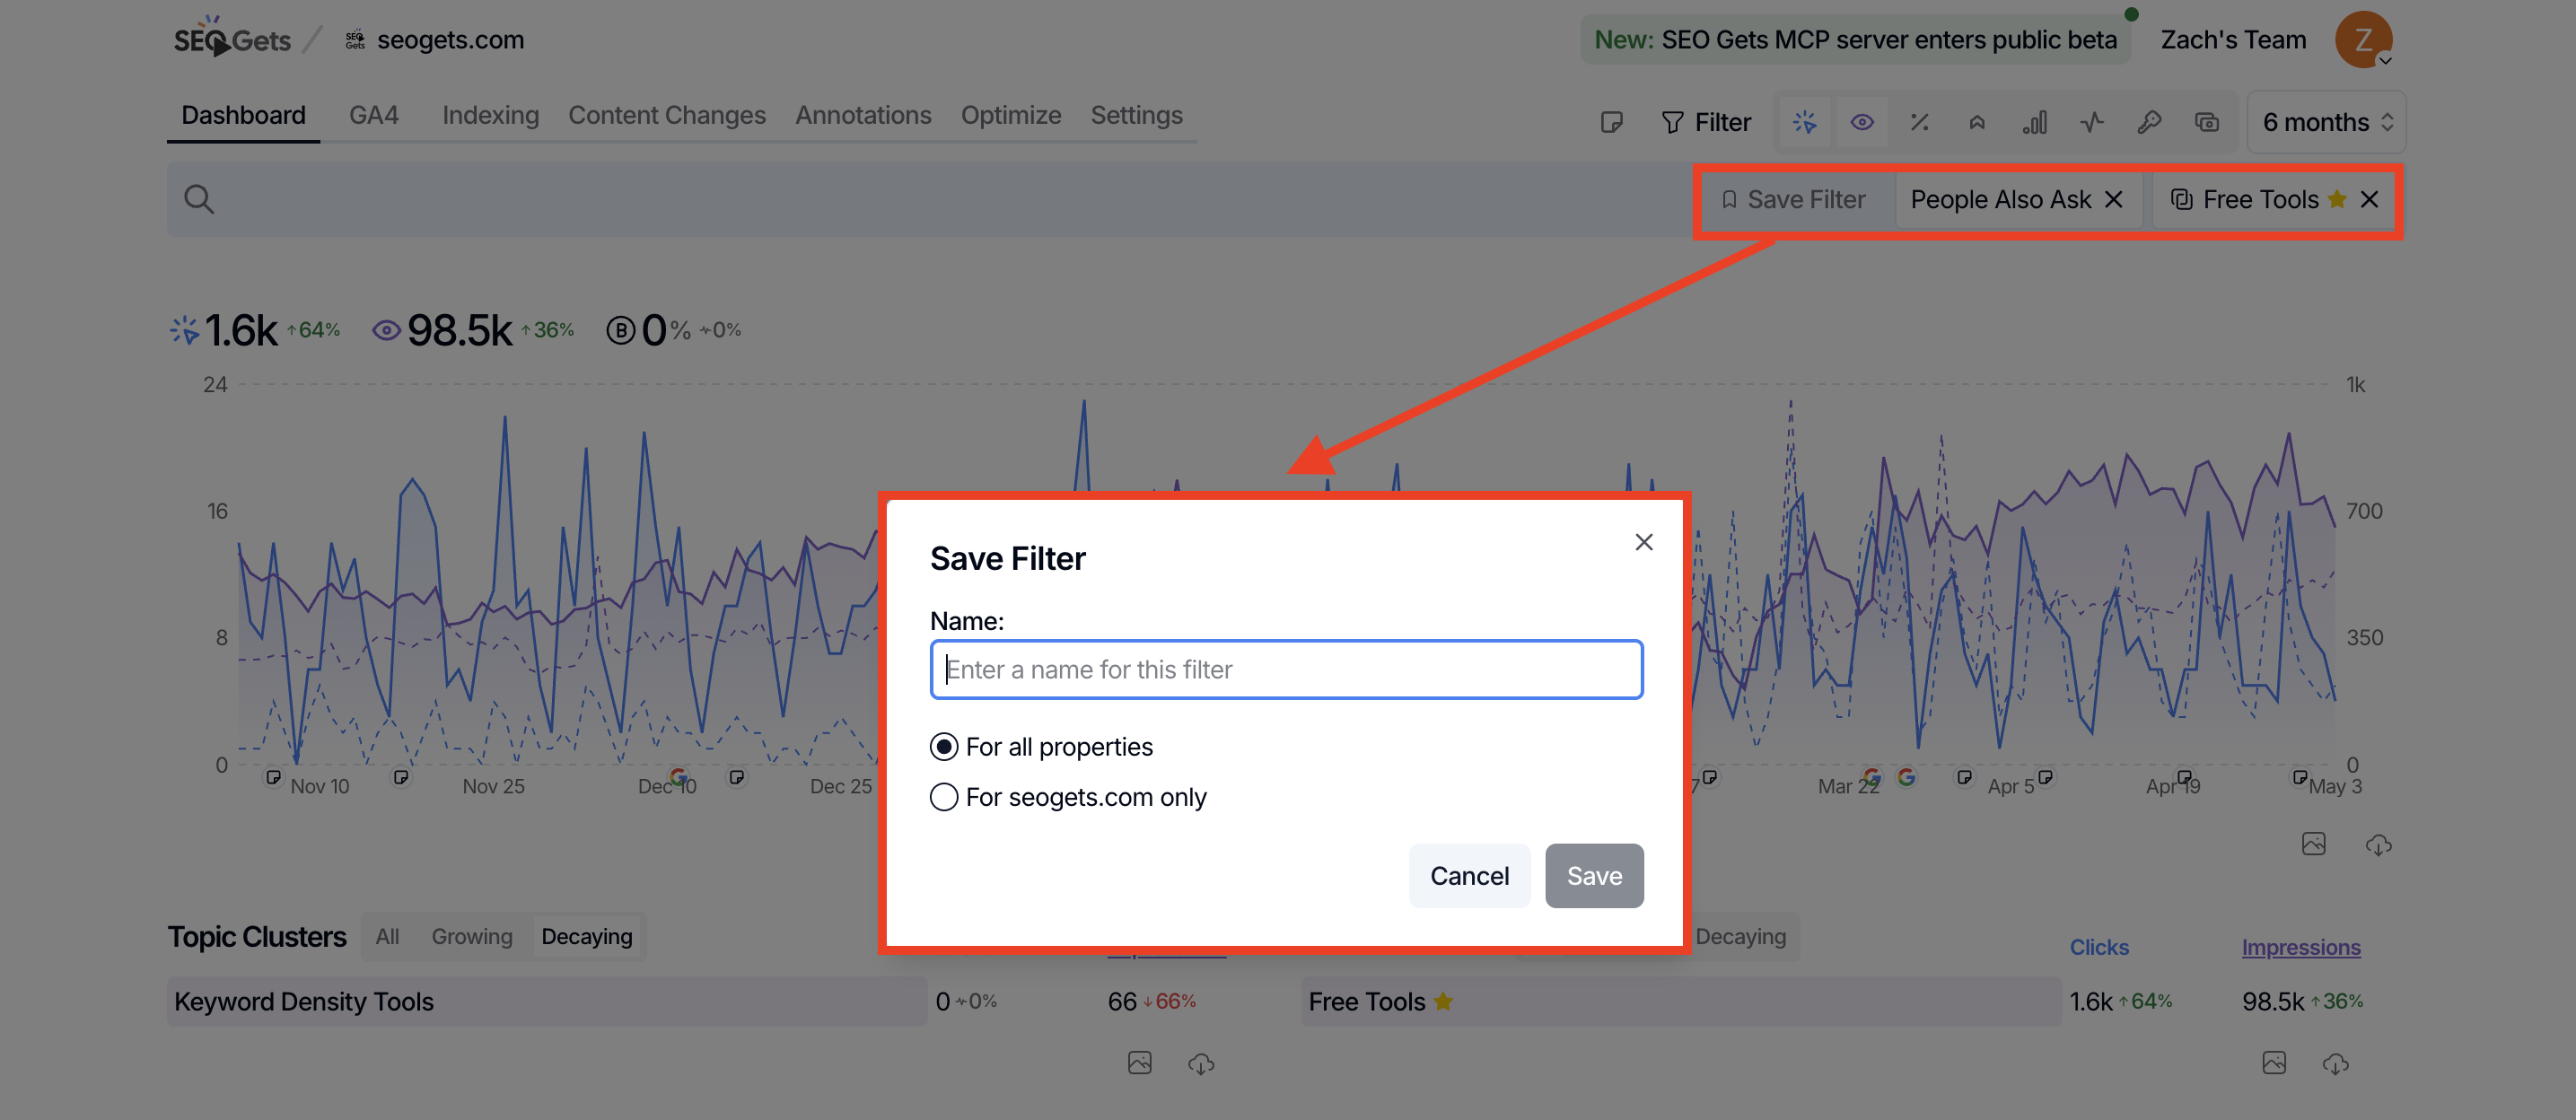
With your filter applied, click Save Filter.
Enter a descriptive name in the Name field (e.g., "Client A - Branded Queries" or "Blog Content Group").
Choose the scope:
For all properties — The filter appears in every site in your account.
For [property name] only — The filter only appears for this specific site.
Click Save.
Your saved filter now appears under Saved Filters in the filter popover, ready to use anytime.
Edit a filter
To edit a Saved Filter:
Toggle the filter on
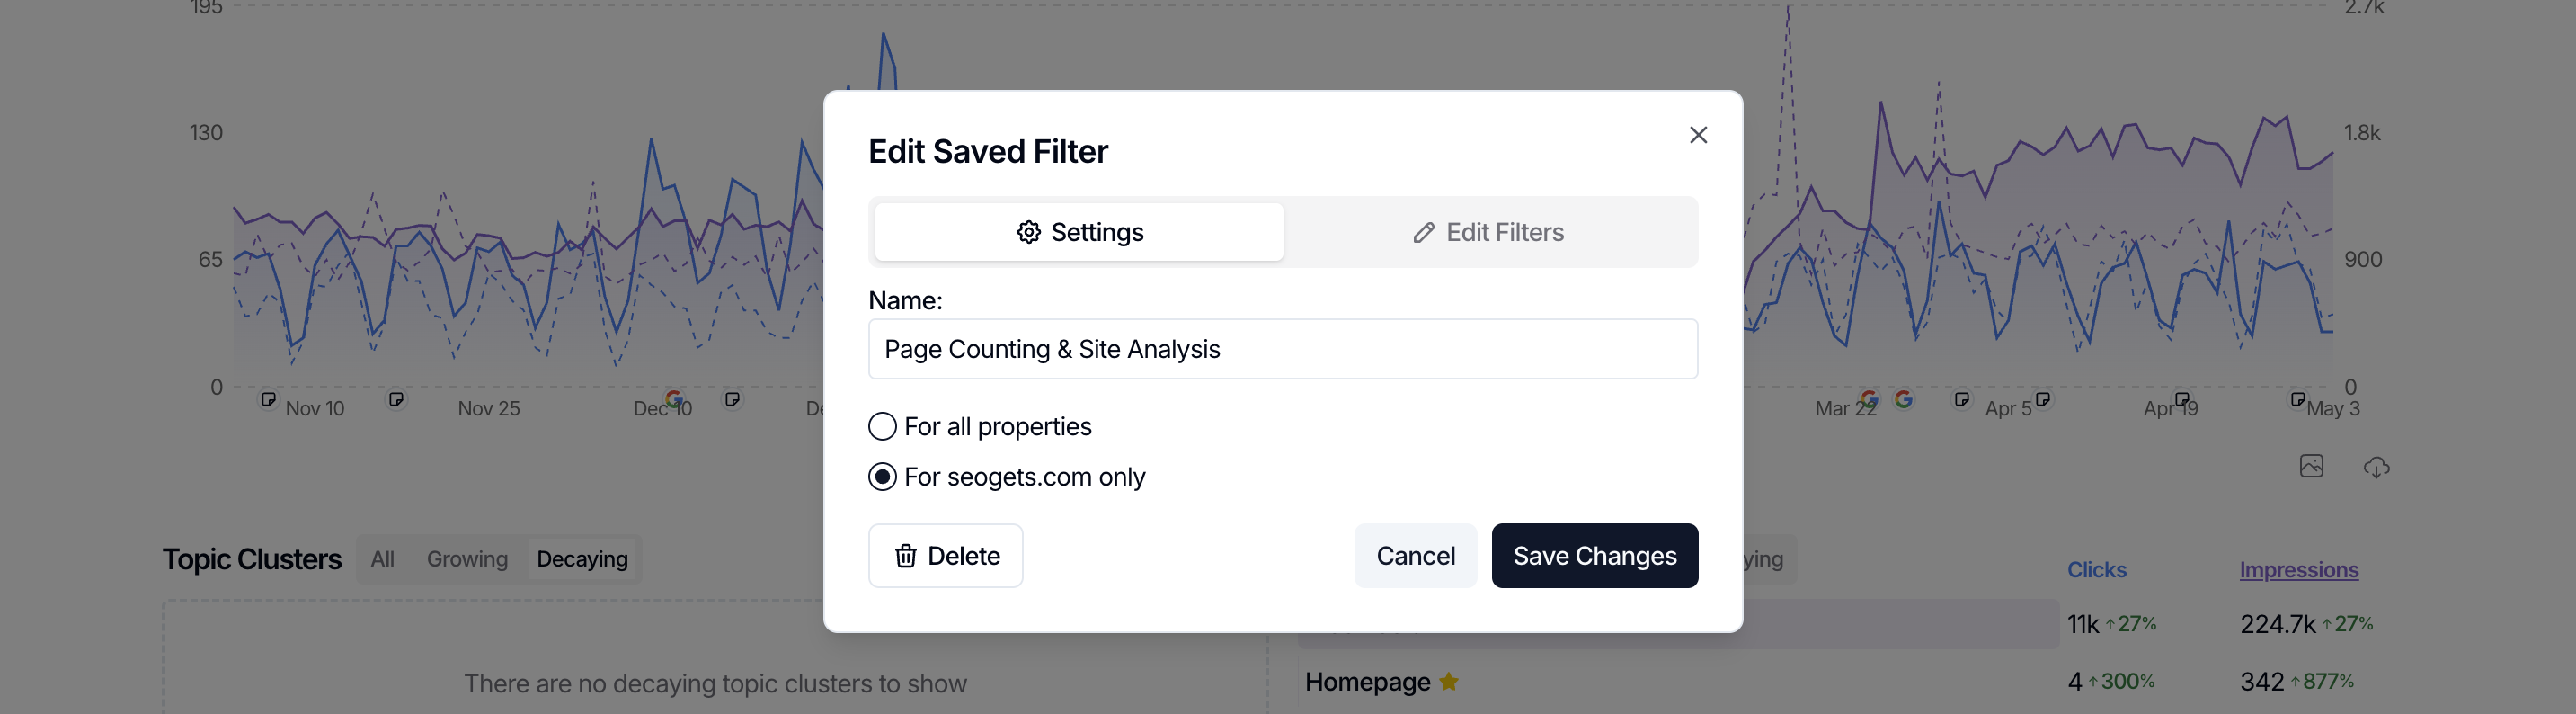
Click on the filter in the filter bar
You'll see two tabs:
Settings — Rename the filter or change its scope.
Edit Filters — Add, remove, or adjust the filter rules themselves.
Click Save Changes when you're done.
To delete a saved filter
To delete a Saved Filter:
Click Filter to open the popover.
Under Saved Filters, find the filter you want to delete.
Click the trash can icon to delete it.
OR
Toggle the filter on
Click on the filter in the filter bar
Click Delete
What's next
Learn how to use regex filters for advanced pattern matching.
Set up content groups to filter by sections of your site.
Build a monthly report using your saved filters.
Understand what URL filters can and cannot exclude to avoid surprises with malformed URLs.