
Upgrade to Super Site
Super Sites are an add-on you turn on for individual sites when you need more data, faster loading on large properties, or access to features like Index Reporting.
Super Sites are assigned by site, not across your whole account. If you need more than one, you can add more Super Sites from your account billing area.
Upgrade a site to a Super Site
Open the site you want to upgrade in SEO Gets.
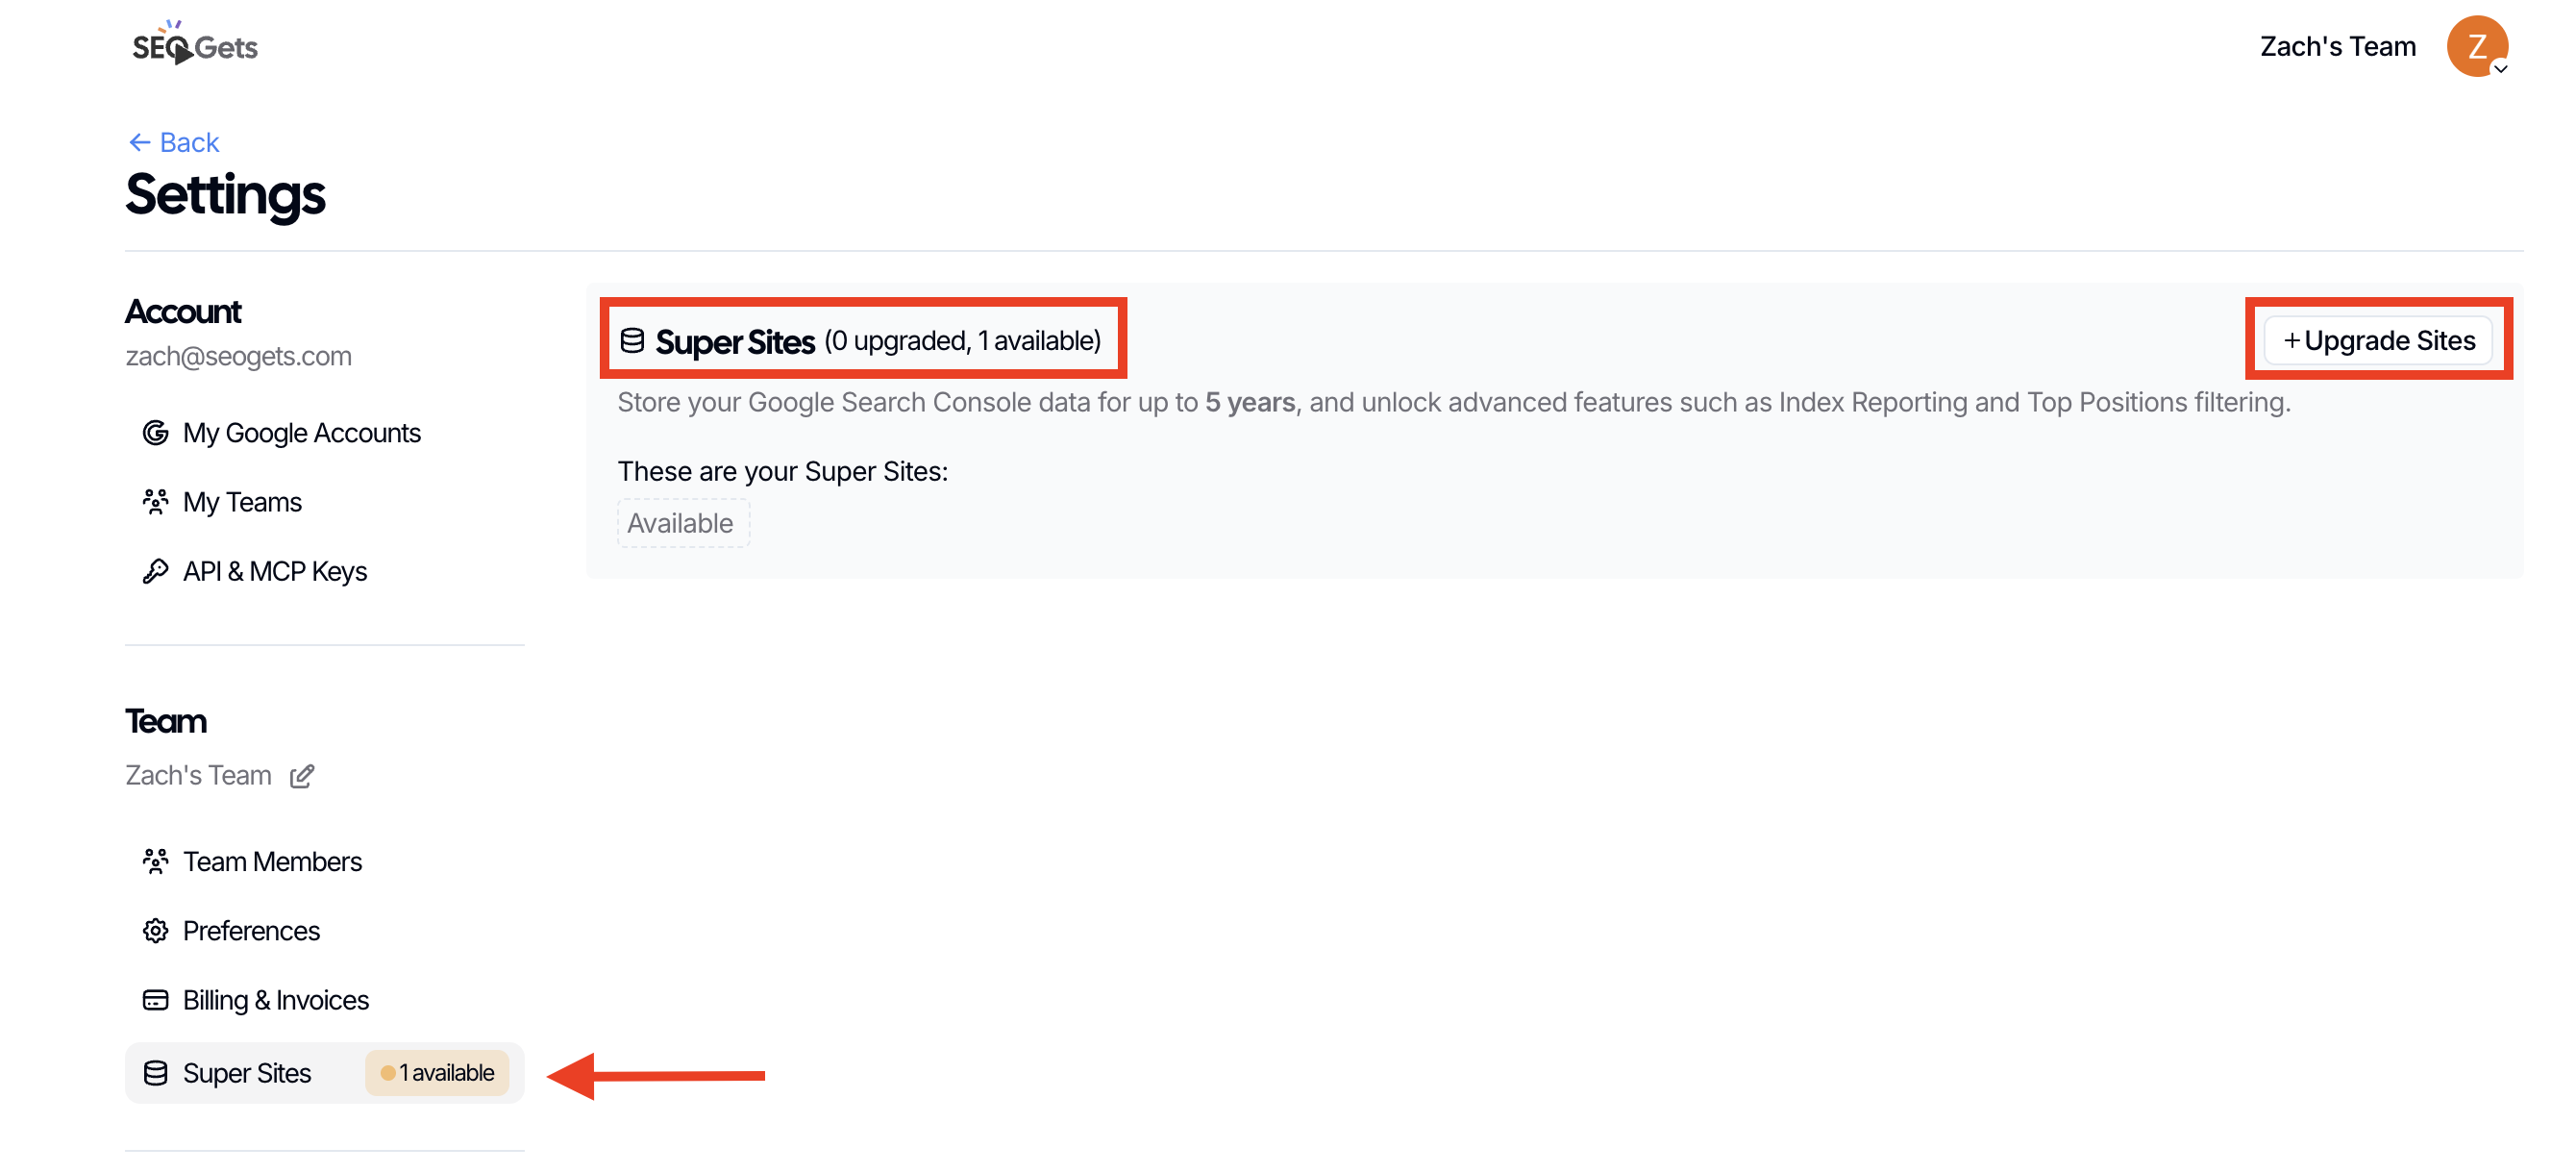
Click on your avatar → Settings → Team → Super Sites.
View the # of available Super Sites in the Team menu as well as the Super Sites module.
Click on +Upgrade Super Sites.
Select a site from the dropdown (existing Super Sites are marked with a green "SEO Gets").
Click Confirm.
Once you have designated a Super Site, SEO Gets will automatically upgrade it so you can start benefiting from expanded features. There's one final step if you want to maximize the value of your Super Sites; setting up Index Reporting.
Designate a Super Site for Index Reporting
Open the Super Site you want to add index reporting.
Click on Settings.
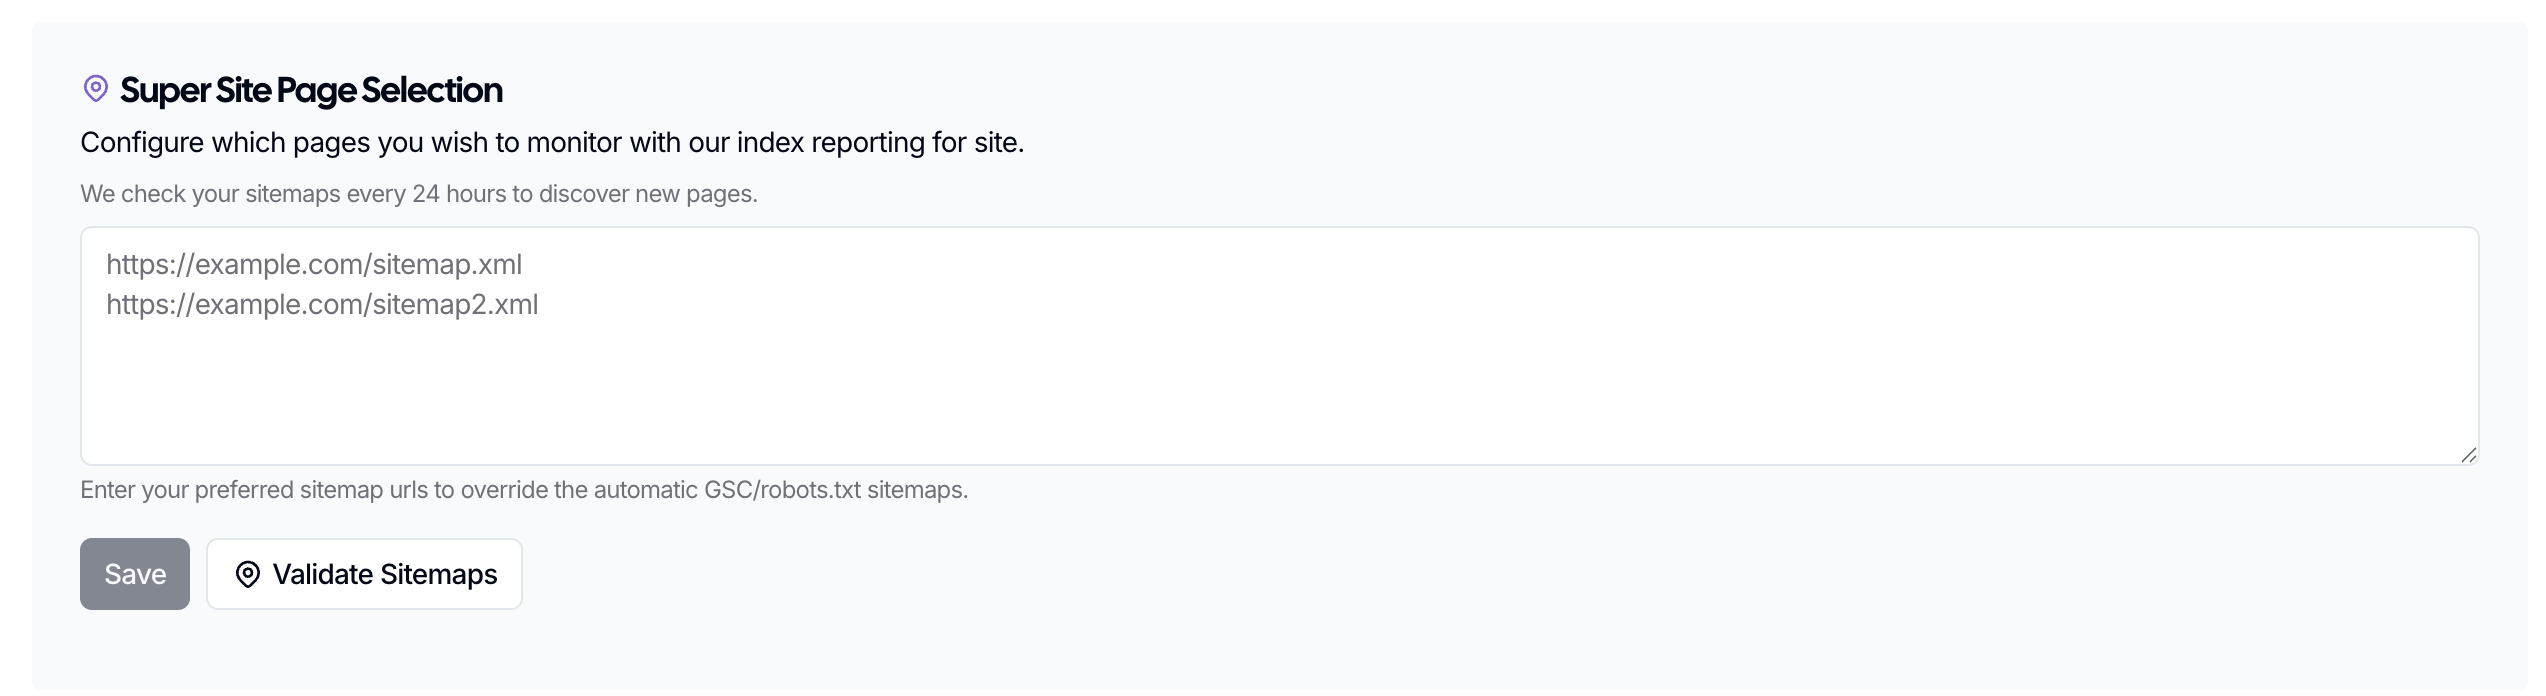
Scroll down to Super Site Page Selection.
Copy/paste the sitemaps from your Super Site.
Click Validate Sitemaps to ensure that your sitemaps are readable.
Click Save.
What changes when a site is a Super Site
Index Reporting becomes available for that site.
Google Search Console data storage is increased from 16 months to 5 years.
You can work with more than 50,000 rows of data.
The dashboard is faster for larger sites.
API character limits are removed for that site.
Limits to know about
Each Super Site can track up to 5,000 pages for Index Reporting. If your site is larger than that, choose the most important sitemaps and page groups in settings, or use additional Super Sites for subfolders or subdomains.
For a step-by-step guide on choosing pages and understanding timing on large sites, see What to expect with Index Reporting on large sites. If your Index Reporting shows 0% progress or stays in queue for longer than expected, see Index Reporting stuck at 0% or showing unexpected counts for troubleshooting steps.